Showing posts with label quick crafts. Show all posts

Monday, February 4, 2013

Quick Craft: Pretty Storage Jars

I save some jars from pasta sauce, bread yeast, salsa, and the like to reuse as storage in the pantry, and this weekend they got much prettier.  Even though the jars functioned perfectly well with Ragu written on the lid, I was tired of looking at old labels.  This weekend my mom and I got together for a craft day and prettied up the lids with floral designs.

Pretty Storage Jars

Tools and Materials:

  • Jars with metal lids
  • Sandpaper
  • All-materials primer
  • Small, sponge-style paintbrush
  • Acrylic paints in pretty colors
  • Tiny paintbrushes


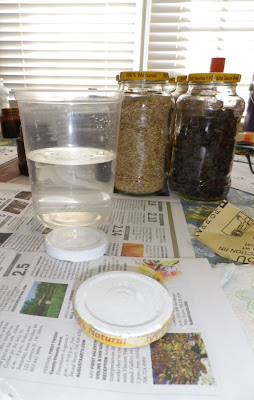
We started by lightly sanding the lids to allow the primer to stick.  We then used the small foam paintbrush to paint the lids.  We figured out eventually that it was much easier to paint the lids while they were on the jars.  We used foam paintbrushes to paint the lids because primer can be hard to clean out of good paintbrushes.

Once the primer was dry we used the tiny paintbrushes and acrylic paints to paint flowers on the lids.  It was a quick and simple craft, though I quickly remember that I haven't painted anything decorative in at least a decade.  It took some time for the creative juices to start flowing.


Glass jars are great in the pantry because you can easily see their contents, they do not retain flavors or smells once you wash them, and they are air tight to keep dry goods fresher longer.  Now I like these even better because they are pretty as well as useful.

Tuesday, January 10, 2012

Beaded Spiral Earrings

When I saw these spiral paper clips in the office supplies section I knew they had craft potential.  This is my first attempt to exploit that potential.  This is another lightning fast craft for a week night.

Beaded Spiral Earrings:

Materials:
2 spiral paperclips
2 earring findings
Beads
E-6000 glue

Instructions:
Spread the spiral of the paperclip slightly so there is room for the beads between spirals.  Apply glue to the center of the spiral, then slide a bead onto the center.


Continue applying glue and beads around the spiral.  After you have glued your second to last bead, slip the earring finding onto the wire and then glue the last bead.  Repeat for the second earring and you're done.


Saturday, January 7, 2012

She Sells Seashells

I have always loved the ocean and its inhabitants.  This quick project combines seashells we used as decorations at our wedding reception with a print of a design I purchased at the etsy store Petite Paperie.

Sea Creatures Art:
Materials:
Tools:
  • Multi-temp hot glue gun (set on high)

I like the vintage illustrations of octopuses.  I simply printed the file in an 8"x10" size and put it in an inexpensive frame.
I arranged the shells at the corners of the frame until I had the design I wanted, then hot glued them in place.

Quick and done! 


Friday, January 6, 2012

Sick Day

When I was a little girl, there wasn't much we were allowed do when we stayed home sick from school.  My mom's rule was that if we were too sick to go to school, we were too sick to watch tv or play. 
I remember coloring on sick days, and today took me back to those quiet afternoons.  I went home from work early because of my persistent upper respiratory issues, and I didn't have much energy for crafting. Quiet coloring was about my limit.

I stamped these owl note cards and then colored them with colored pencils. 

Hoo's Hoo Note Cards
Materials:
  • 6 Blank note cards
  • Colored pencils
  • Ink pad
  • Stamps

The bottom two owls are not
yet colored.
Ta da!


Thursday, January 5, 2012

No Hassle Tassel

Tonight I went out to dinner with my wonderful friend Chenille.  When I got home I needed a quick craft so I could get my sick self to bed.  I'm so glad tomorrow is Friday.

Tassle Earrings
Materials: 
  • 2 tassles
  • 2 head pins
  • 2 gold plated french hook earring findings
Tools:
  • Needle nose pliers
  • Round nose pliers
 

Remove thread loops on the
tassels.
Poke the headpins through the
tops of the tassles, then
bend loops on both ends of the
headpins.  Having loops in both
ends will hold the tassel on the pin.


Add earring findings through the loops
on top.


Giant and lovely.

Monday, January 2, 2012

They Call It Hot Glue for a Reason

This project was a lot of fun until I managed to give myself second degree burns on the hot glue.  If I had listened to the great Martha Stewart I would have averted that injury.  She suggested keeping a bowl of ice water next to your work when using hot glue.  Please learn from my pain.  Always listen to Martha.

We used these glass decorations in the centerpieces at our wedding reception, and already had the potted plant.  I'm excited that I got to reuse the glass to make something so pretty.  I really like the way this project turned out.

Embelished Flower Pot
Materials:
  • Flower pot
  • Decorative glass 
  • Multi-temp glue sticks
Tools:
  • Multi-temp hot glue gun
Preheat the glue gun on the high setting.
Apply decorative glass chips in a
random pattern.


Keep gluing.
Fill in any gaps with smaller glass bits.

I also took the opportunity to clean up my plant a bit.
I love the results.